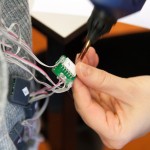
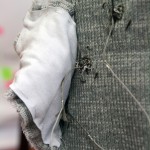
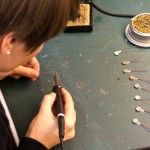
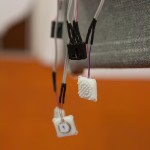
 Next to redesigning the dress and designing the interactions, in order to prototype the behaviour of the garment (including the interactions and vibrations), we had to redesign and rebuild the hardware embedded in the textile. The hardware consisted of the electric circuit connecting the PCB control modules, vibrating motors and touch sensors, and a Master control element – LilyPad Adruino. Control modules and vibrating motors are enclosed in custom-made 3D-printed casings. The whole garment is powered by a battery that is connected to the master module.
Circuit design

 We decided to design the whole architecture of the garment as a series of 16 control modules connected together and programmed as slaves (being controlled centrally by the Master module). Having this design, we are able to add or remove control modules from the circuit as needed, and the programming of the behaviour is done centrally at the master module.
Control modules
 Control modules were a custom-designed PCBs produced by Metatronics for the Crisp project. The modules have internal memory that can store the program defining the behaviour of every module. In our case, all modules were programmed to listen just to the commands of the slave and respond to them. Modules were interconnected in series, having a unique address defined. Then they were controlled by the Master module that reached them by their address. Control modules can have multiple input and/or output devices attached; we used 16 vibrating motors as output devices, and 6 touch sensors as input devices.
Each module was enclosed in a custom-shaped 3D-printed casing, which included the printed circuit board, and also contained little protruded holes that we used for sewing the casings to the textile. The casing was designed to have rounded edges and corners, to make sure it does not cause any discomfort when for example users incidentally press the dress at the place of the casing.
Vibrating motors
Ten control boards (placed at the upper back body locations) and six control boards (placed at the deep abdominal muscles location) have vibrating motors attached. We used motors of type KE8-944 (similar motors as those used in mobile phones). These motors are shaped as flat cylinders, 10 mm in diameter, and 3 mm in height, operating at 3 V DC, 70 mA.
The motors were attached into custom-designed 3D-printed casings. These casings were designed to spread the vibrations over a larger surface, staying as flat as possible. The transfer of the vibration on the skin through the textile was even supported by placing tiny spikes on one side of the casing (the side oriented towards the skin). The corners of each casing contained little eyelets that can be used for attaching the casings to the textile.
Touch sensors
 Six control modules positioned on the front (abdominal muscles) area were also attached to the touch sensors created from the conductive thread, in the form of a conductive embroidery. More details about the look and creation of the touch-sensitive embroidery are described in the previous blog post.
Master module
As a master module controlling the whole circuit we first used Arduino Uno (powered from the computer via USB), and in the end of the prototyping phase we replaced it with LilyPad Arduino USB. This LilyPad Arduino is more suitable for our purpose, because it is flat, small, washable, and still sufficiently powerful. Arduino is attached to a 3.7V battery (1200mAh) powering the Arduino and the whole circuit with control modules and vibrating motors. Arduino contains the program defining the behaviour of the whole garment, which is convenient for maintenance (we do not need to re-upload the software to each of the 16 control modules separately, but only to the master module), and also for the further development. You can read more about the software in the following blog post.
The prototype is currently very sturdy and reliable (especially in comparison to the previous prototype), so it can be (and we hope it will be!) used for further tests and exploration of vibrating wearable smart textiles. Moreover, it became a truly interactive device with specifically defined behaviour responding to the user’s actions.


